Creating a new session in ProTools.![]() -back-
-back-
Locate the Pro Tools Program in the Application folder or the pop up Dock at the bottom of the screen.
Once the program is initialized the protools top menu will be visible in the upper left hand side of the screen (top pull down menus).
Create a new session by using the file pull down menu, set the settings, and save the session (project) on a local drive. The new session dialog box can be expanded so you can see more of the file tree.

If you are on one of the networked ProTools stations (you've logged on with to your student account), a good place to save the file is in your documents folder.
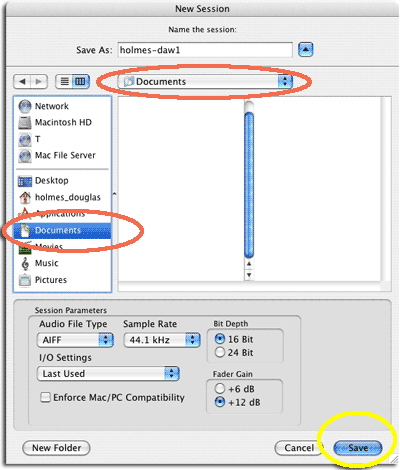
ProTools will create a session (project) folder where you tell it to. This session folder will be named the the name you choose. Inside the folder Protools creates some other folder that will be important to asset and file management. It will also create a ProTools session file that holds the edit decisions you make in the sessions.

Make sure to leave this file structure intact. Save your imported audio files to the audio file folder created by protools in you root session folder. Don't move your asset files around after importing, Protools reads these file directly from the harddrive.
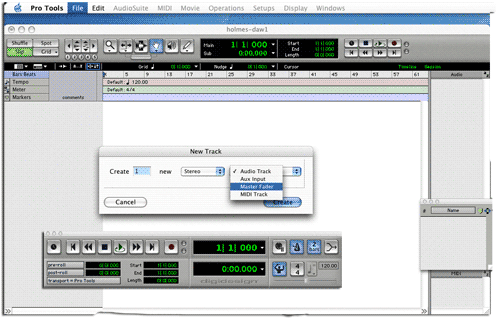
Using the file pull down menu select "New Track." A dialog box will popup. Set it to create one new stereo Master Fader and click on create.
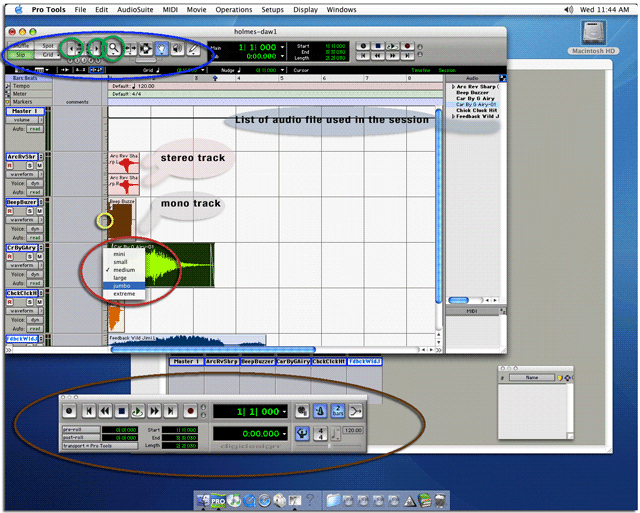
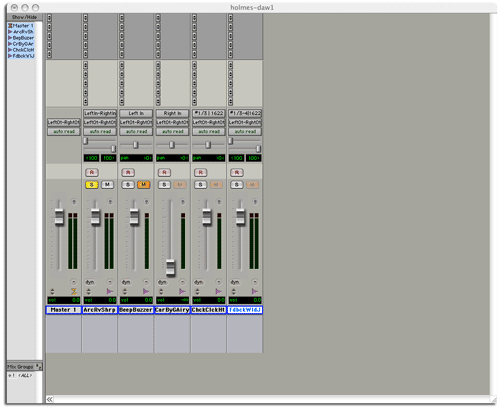
Using the Stereo master track's VU meters (the two meter highlighted in yellow) you can see (monitor) how the tracks in your mix add together.
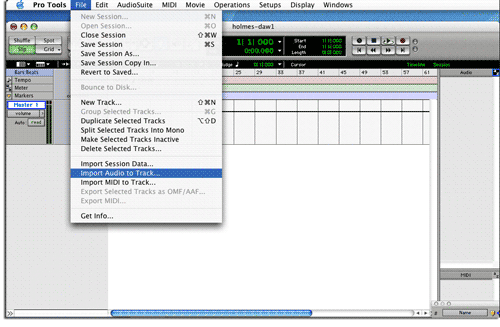
To get sound file into track, use file menu; "import audio to track."
You can select to import multiple audio files. You can audition, select, and convert a list of file at once. After you have selected the file you want to import click done.
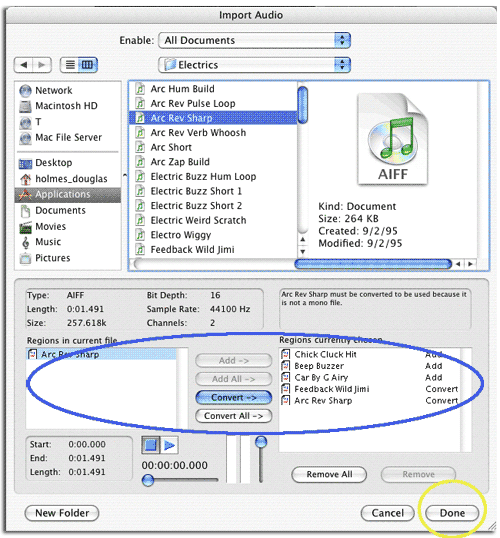
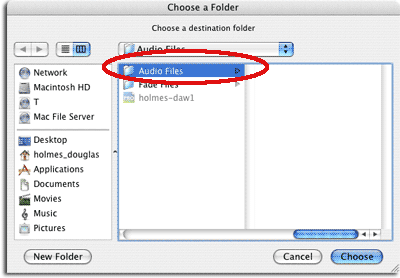
Choose to store the copied audio file into your project folder, in the audio folder created by ProTools for your session.
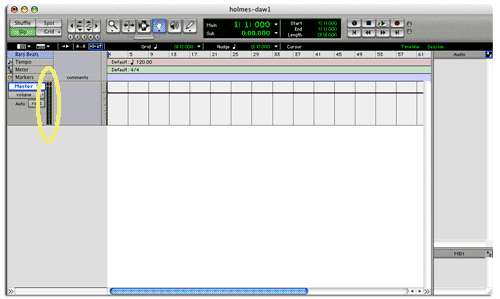
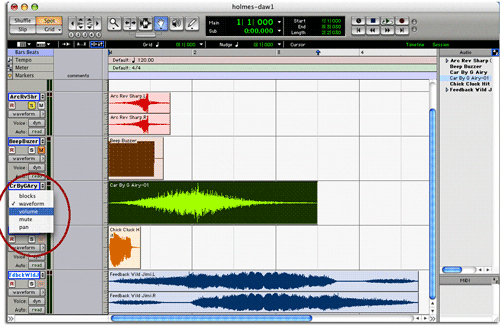
Now that you have some audio files loaded into tracks you can see;
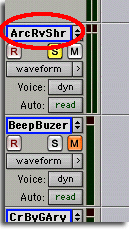
The track name can be changed by double clicking on it and typing the new name in the dialog box. Each track can be muted (silenced) or soloed (only one playing) by clicking ton the toggle buttons (S and M) for each of the tracks.
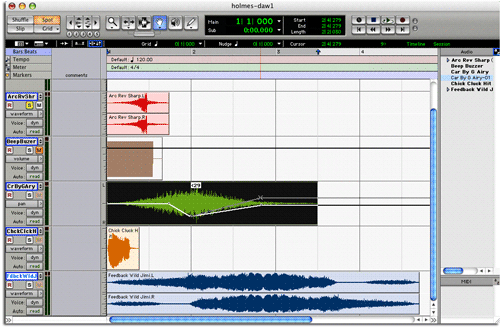
The volume level of each track can be set and automated using the region display pop up menu. After selecting volume, a level line will appear. Using the grabber (hand) toll you can set the level changes by clicking on the line and setting a key frame.
The key frame level can then be adjusted using the grabber tool to click and drag. Volume adjustment should be used for subtle changes in the loudness of the track. Fade ins and outs should be used for envelopes.

The pan (placement of sound using two channels L, and R) can also be adjusted (automated in this way).
The pan and volume automation can be seen in the mix window in real-time. The automation this actually move the faders on the DIGI003 unit.
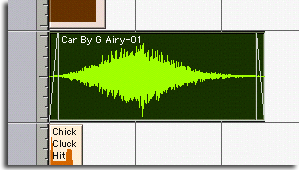
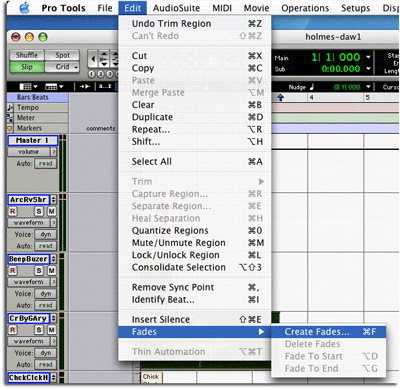
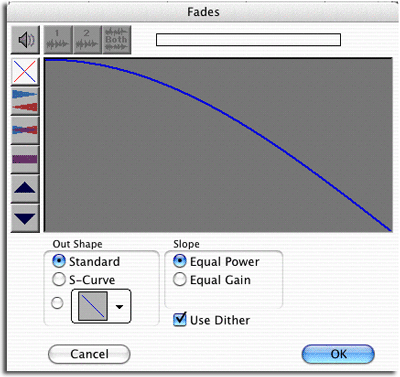
After selecting the audio region that is to have a fade created, select create fades in the edit pull down menu. This will create a amplitude adjustment to the sound file. It is a nondestructive edit that imposes a volume change on the audio file. A fade file is automatically created and stored in the fade folder in your project folder
After the mix has been finalized, you will want to bounce the thing into a stereo format to be used on some media.
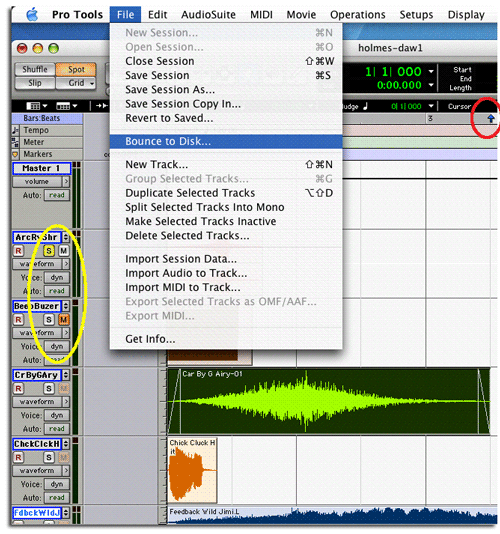
Set the bounce to disk dialog box to create the correct format file.
Name and save the file in the session (project) folder (it is a good idea to keep all file in the session folder that protools creates when you make a new session).