Douglas B. Holmes |
Tutotial: DVD and Blu-ray authoring
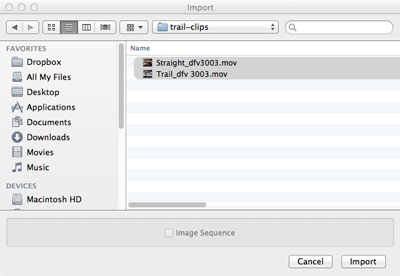
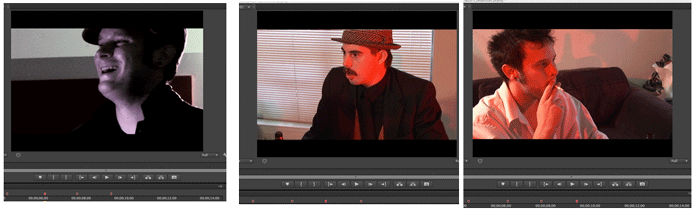
Open Premiere and import movies clips
Arrange on the timeline
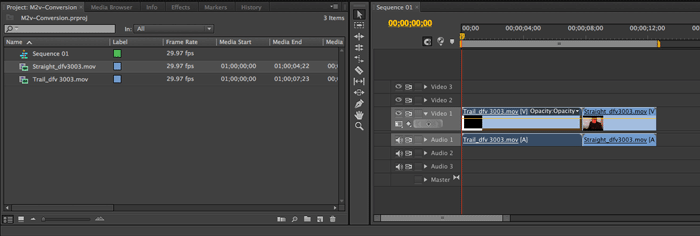
Include 5 extra frames using the in/out points and make default transition (for MPEG2 we have to have at least five frames of black to make sure we dip to color all the way)
![]()
Set Encore Chapter markers on timeline
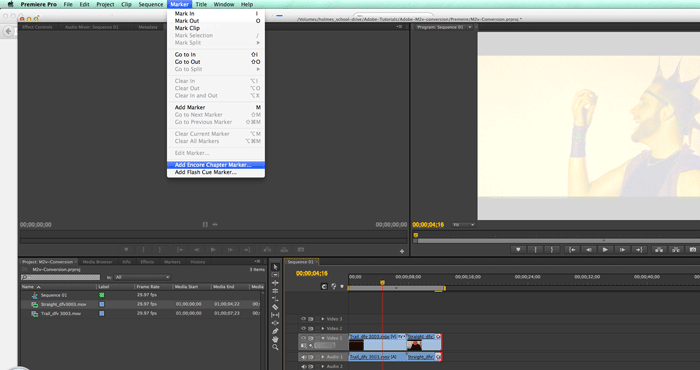
Name your chapter marers (the first chapter you created will be named chapter 2)
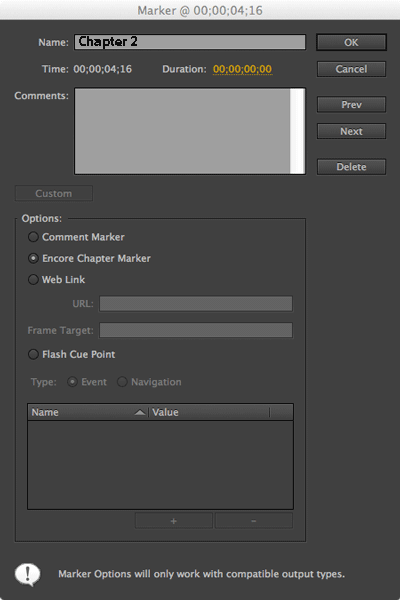
Repeate at these frames (chapters 3, 4, and 5)
Once you have all of your chapters marked we can export
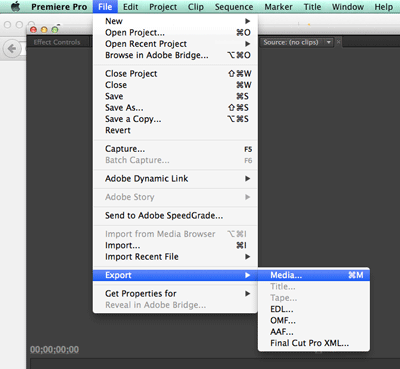
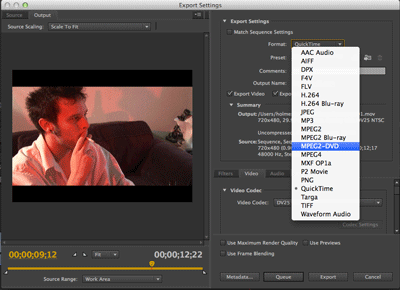
Choose the MPEG2 for DVD setting (Elementery streems)
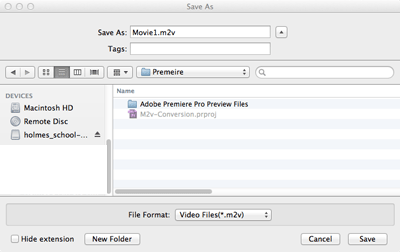
Name your export file (simple names, no spaces)
Lets look at the expanded expot setting
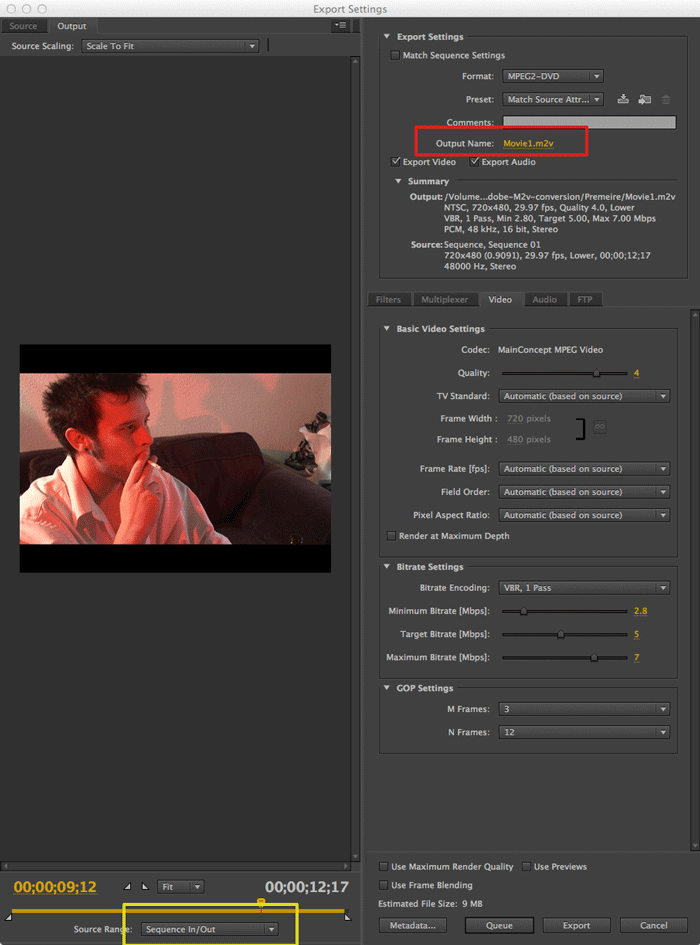 |
|
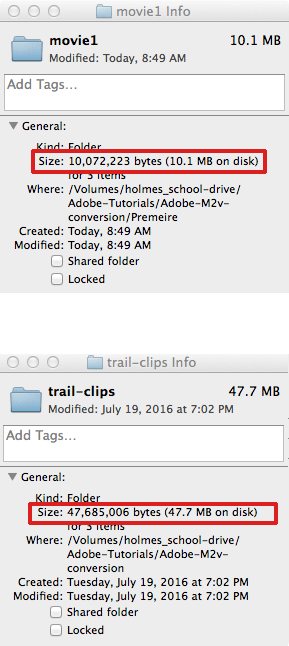
Check out the file sizes of the raw clips vrs the M2V and audio files. Watch them in quicktime, see which you like more
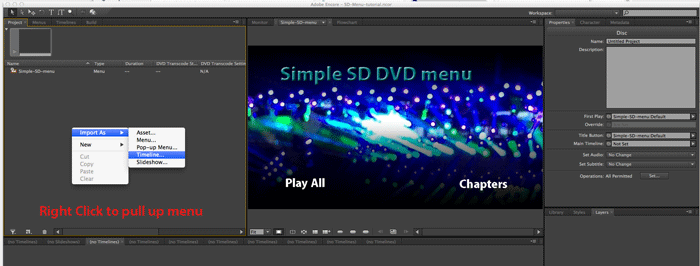
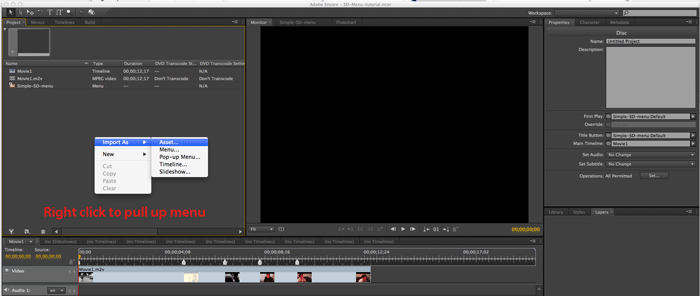
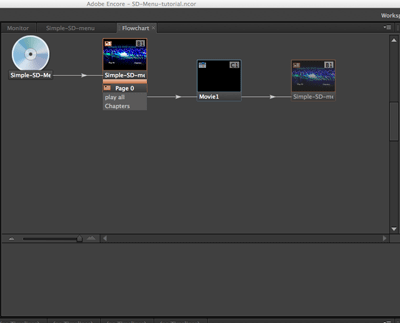
Open Your Simple-SD-menu totorial. We will be adding on to what we have done so far
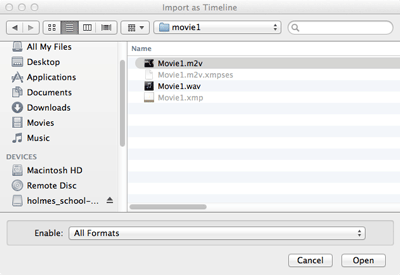
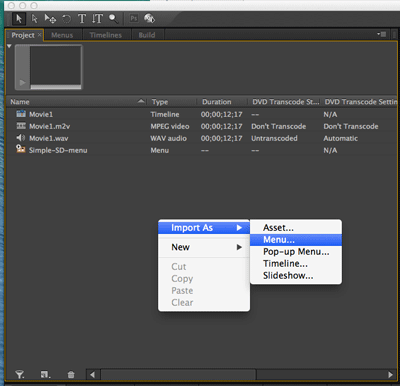
Import the M2V
select your M2V file
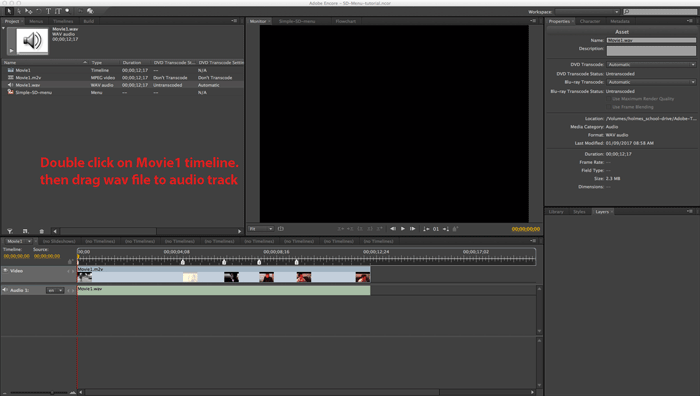
Import the audio
Select the wav file

Double click on the timeline then drag the wav onto the audio track
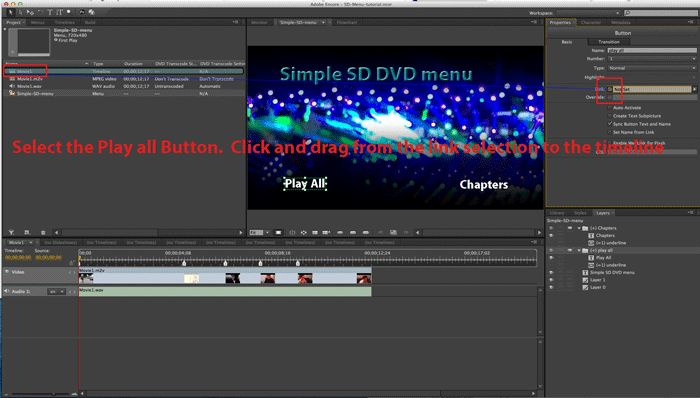
Link the play all button to the timeline
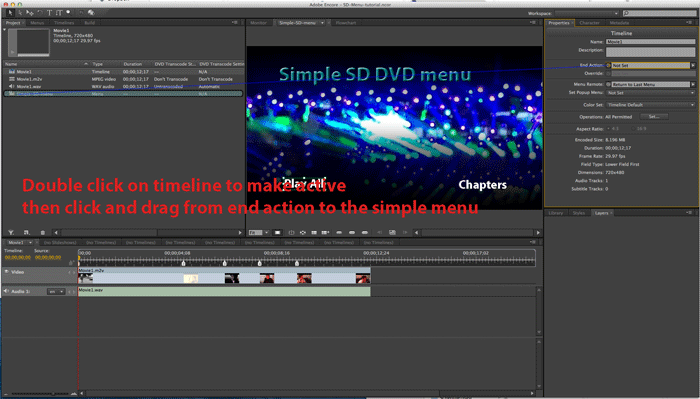
Make the link from the timeline back to the menu
Take a look athe the flow chart, then preview. Note that only the play all button should function.
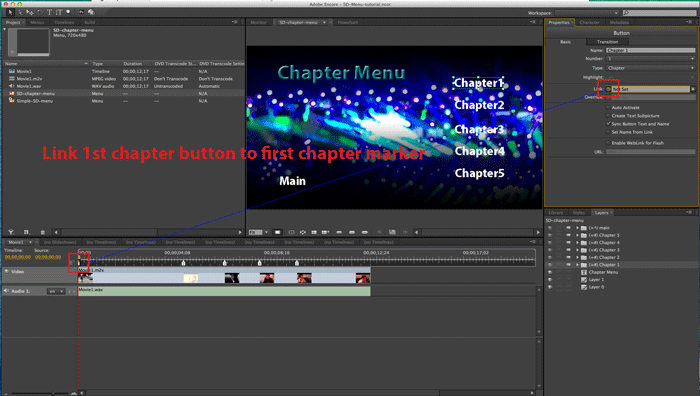
Import chapter menu
Link first chapter button to first chapter on timeline
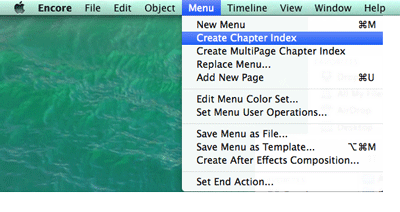
Using pull down menu, create chapter index
Link the Main Button (back to main menu) on the chapter menu and the chapter button on the main menu
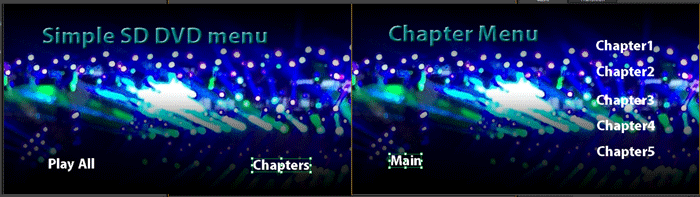
Save and preview you DVD. You need to trouble shoot if it does not work properly.