Douglas B. Holmes |
Tutotial: Music Engineering
Using logic to score a movie - logic scoring
Note many of the pictures for this tutorial were made in logic 9. The school has logic 10. The user interface has changed a little, but the same techniques can be applied.
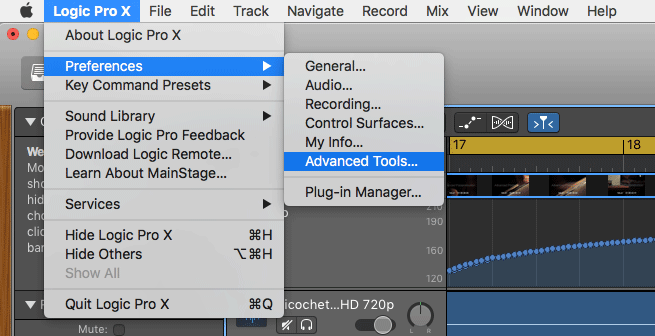
Open Logic and go right away to the preferences. A tab called advanced will let you open up advanced menus in logic, open them all, you are an advanced audio person (at least some of you :)
This is a picture of Logic X Prefs
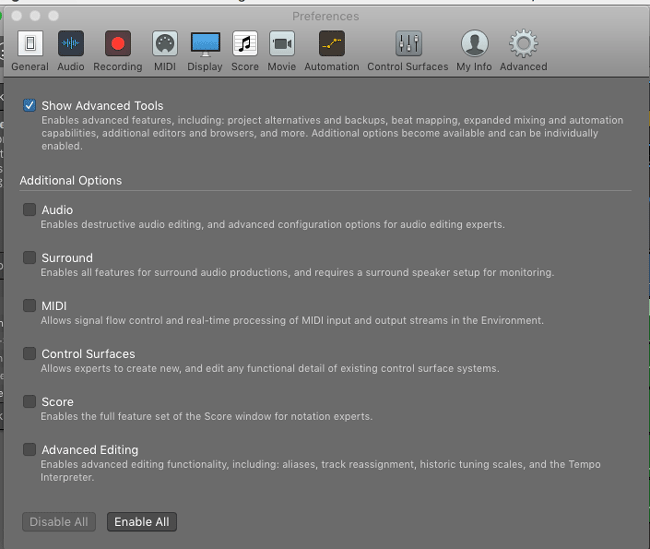
This is a picture of the advanced tool menu in Logic X
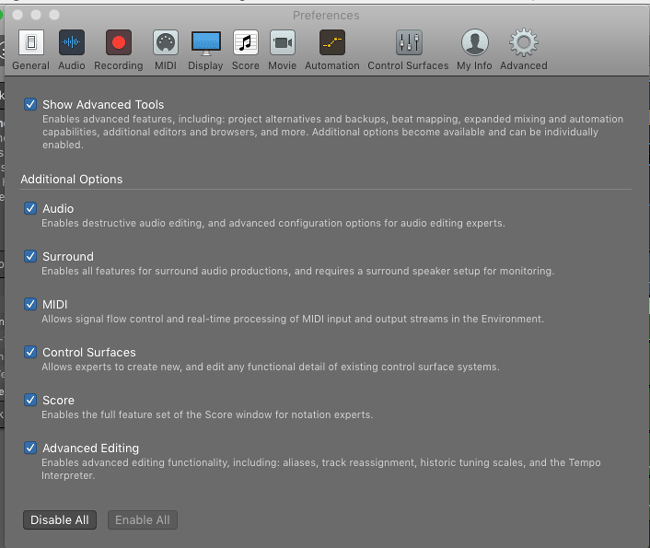
Enable all advanced tools in Logic X
Save your empty logic session. It will make a project folder for you as long as you click the copy audio files.
Inside of the logic folder make a folder called picture lock and populate it with the video provided on the instructor drive.
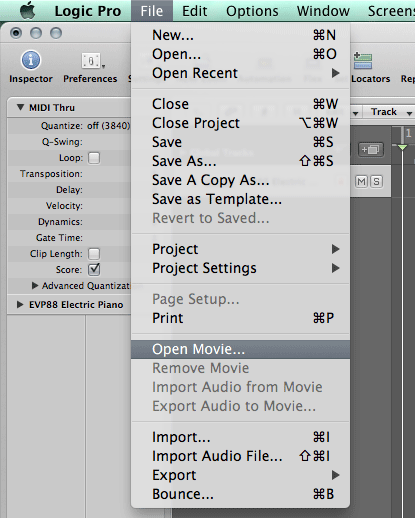
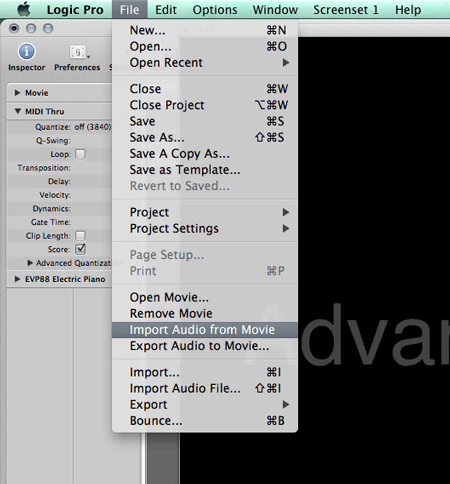
Import the movie into logic, then import audio from movie
1..  2..
2.. 
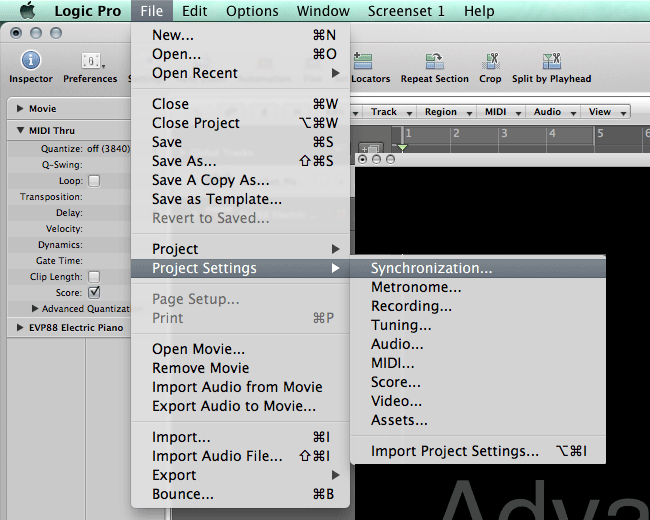
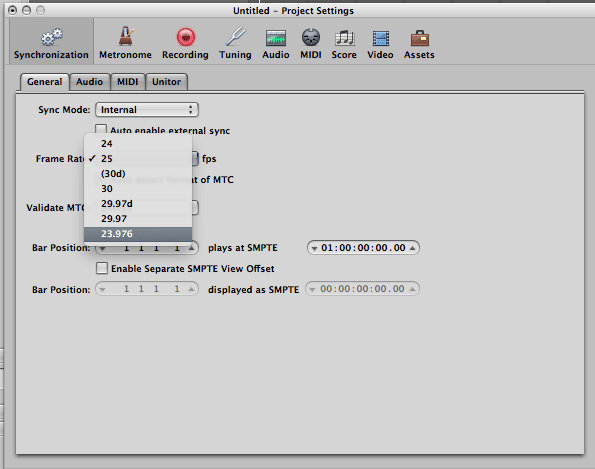
Set your movie rate using the synch project settings. Project settings are where you can set audio rate and such for the project.
This example is 23.976 FPS. Note here you can offset bars and SMPTE
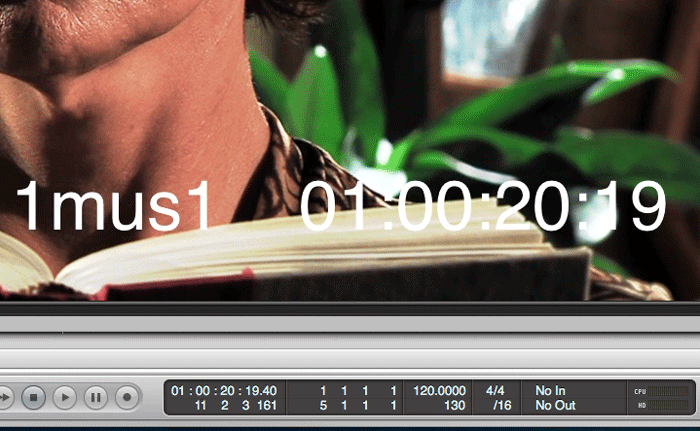
Make sure to double check the video timecode with the transport timecode to make sure you have lock
What I do next: I make a midi cue track
I create a midi track, populate with a basic instrument. Then I open the keyboard tool (shift lock) and I play notes, marking with a sound important spots in the video clip. Watch the movie a few time, think about section and synchronized element that will be important in scoring. For this movie I would mark the start and end of the production logo, mark moments in the movie you want to draw attention to, like when the shadow show up in the door. The key name in the pre credits, the title and the end of title sequence are also important to take note of. Record the simple midi cue track, it is fun and useful.
After recording I will make adjustments of midi note position, use your mouse. As you slide the midi note the frames of the movie change with it’s new position. Get it right because in the next step we will lock the midi track to SMPTE making it immune to tempo adjustments
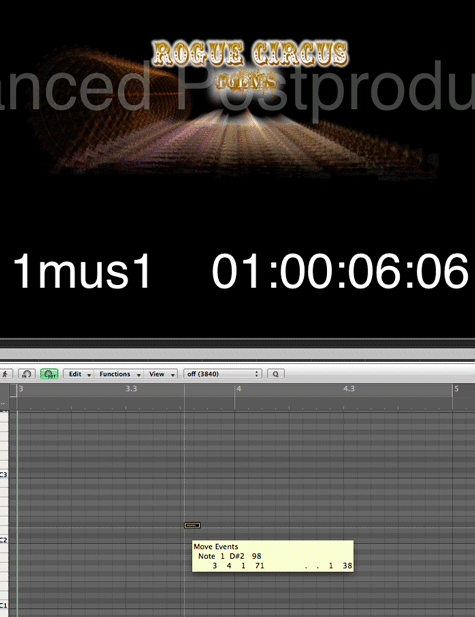
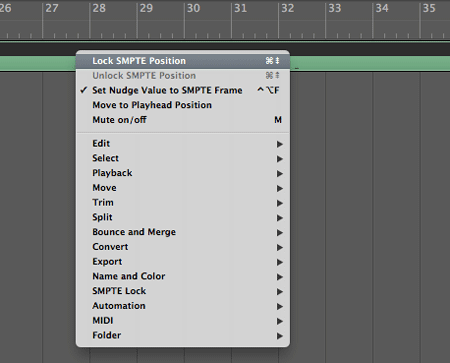
Lock your adjusted midi cue track to SMPTE by right clicking on the midi region
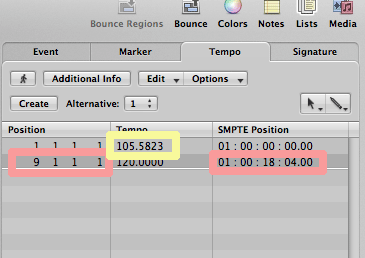
One way to find a good starting tempo is to count out eight to sixteen bars at a tempo in our mind. Watch the clip a few times, try to think about a tempo that make your musical ideas fit with the tempo and pace of the film edit decisions. Start the play head from bar one, count out loud: one, two, three, four, two, two, three four……..sixteen, two three, four, Seventeen. On the down beat of 17 stop the play head. We can use SMPTE to help us solve the tempo.
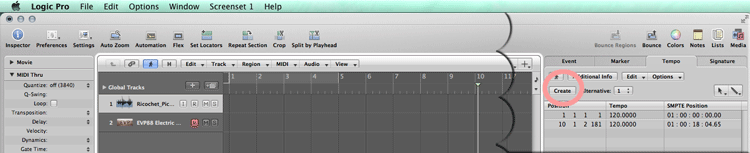
After your counting we can open the tempo list and use it to figure out the tempo. Create a new tempo change, and we will adjust the bars and beats and set the SMPTE time
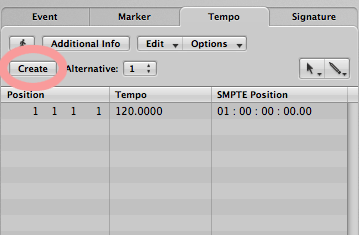
When you make the adjustments here (I did only eight bars), set the bars and beats to that next measure (in this case bar 9 beat 1) in your case it would be bar 17 beat 1. Note that after setting SMPTE and bars and beats the previous tempo in the list will be adjusted. It is a good idea to round off your tempo. In this case I might choose 106 bpm. If yiu dont want any change in tempo, just delete the adjustment at bar 9, or type the tempo in at bar 9.
I then use my midi cue track to help me tempo map the video clip. I'll show you mine in class so you can get an idea of how I work.
Here I have decided to have a tempo change using a curve. The tempo adjustment tools are in a new place on the logic 10.
this is where you find tempo operations in Logic X

this is an exampe of a tempo operation curve
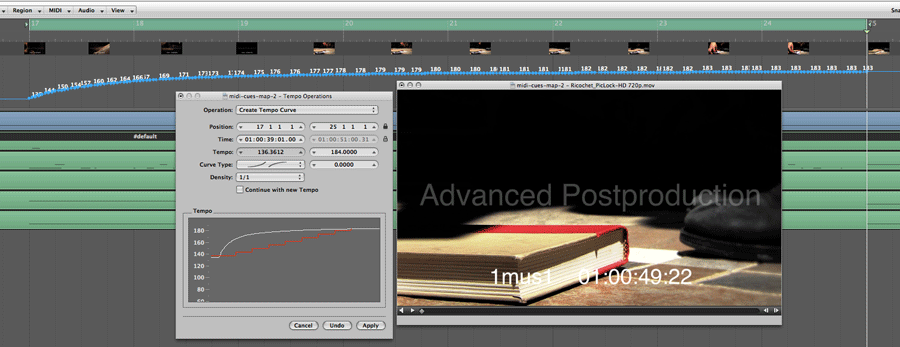
Note. Use the lock icon before typing SMPTE or bar infor in the tool. In the above example I was trying to have the down beat of measure 25 coencide with the foot fall of the villian. I still need to type the timecode visible on the above picture to have the tempo adjustment work correctly for what I was marking
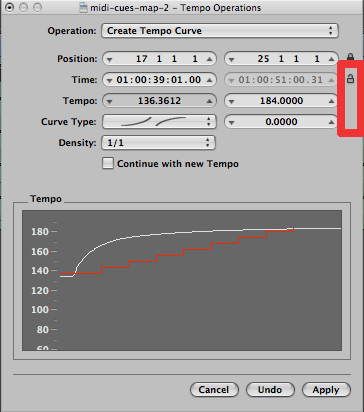
Note. Use the lock icon before typing SMPTE or bar information in the tool. In the above example I was trying to have the downbeat of measure 25 coincide with the footfall of the villain. I still need to type the timecode visible on the above picture to have the tempo adjustment work correctly for what I was marking up.
Have fun. Compose something cool and bring your session to the next class all locked up and marked up, and tempered up. You can even make a musical sketch like the one I showed in class. We will be doing more with this example.